An EXIT Toys heat pump for frame pools: everything you need to know
With an EXIT Toys heat pump you can enjoy your frame pool even during colder days. Curious about how a heat pump works? You can read all about it in this blog.
We are also looking for Easter eggs this weekend! From Tuesday we’ll be jumping with joy to help you again.

The choice has been made; your garden is going to have an EXIT Toys frame pool in it. But how do you best set up an above ground frame pool and what things do you need to take into account in advance? EXIT Toys lines up the most important steps for you, so you can quickly enjoy endless summers of swimming fun!
Setting up your metal frame pool starts with a proper preparation. We are happy to explain the steps to you
Before setting up the frame pool, it’s important to determine where you want to place it. EXIT Toys is happy to explain what would be the best place for your pool:
✔ Place the frame pool on a flat and stable surface, like grass or a tiled part of the garden.
✔ Make sure the surface is straight, so the water level is even and there won’t be an unnecessary pressure on one side of the pool.
✔ Preferably, choose a place with direct sunlight so you can enjoy nice and warm frame pool water even quicker.
✔ Sweep the place where your frame pool will be with a broom.
EXIT tip: place a groundsheet underneath the frame pool. A groundsheet protects the frame pool from damage caused by the growth of weeds and prevent grass or sand from sticking to the liner. That way you’ll enjoy your frame pool extra long.
At this point it’s wise to check if you have all the parts. Check by means of the manual, which you can find in one of the boxes, whether you’ve received all the parts. Do you have them all? Great, then you can now start setting up your frame pool.
Is there a part missing? Then wait with setting up your frame pool and contact our customer service.
Now you’re well-prepared. Let the set-up begin! EXIT Toys guides you in setting up the above ground pool, connecting the frame pool pump(s) and filling the pool.
Yes, you can start setting up your frame pool. We recommend doing this together with someone else. This is faster and sometimes you can use a pair of extra hands.
In the manual of your frame pool we describe exactly how you can set up the metal frame pool. If you follow these steps, you will certainly succeed.
Attention: Do you have a rectangular pool of 100cm or taller and does it seem like the corners are loose? Don’t panic! Our rectangular pools have corner parts with a smaller diameter than the tubes they are in. This space is necessary so the water can divide evenly. Due to this, we prevent the liner from tearing. Once you fill the frame pool with water, the pool will expand and the extra space will reduce.
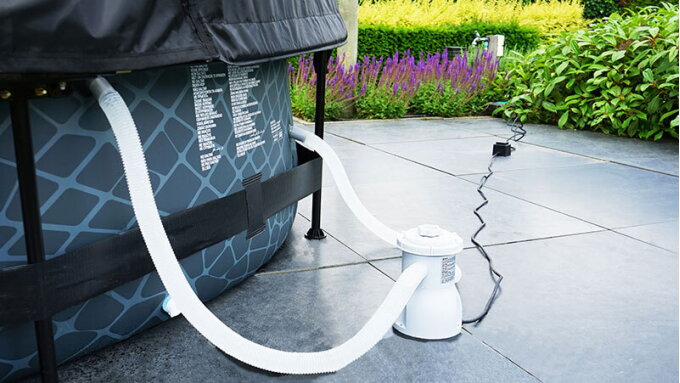
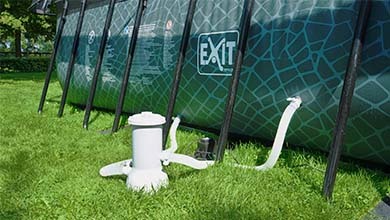
Now that the pool has been set up, but not yet filled with water, it’s time to connect the filter pump. This is also the moment to connect a heat pump. In any case, be sure to do this before the water reaches the lowest connection point in the wall of the pool. We understand that you cannot wait to jump in, but connecting the pumps is just easier done above water!
To make sure the tubes of the filter pump won’t come loose, it’s important to first attach the entrance and exit sieve to the inside of the frame pool. This can be a bit tricky, but by pushing and turning at the same time, it gets much easier. You can also put some vaseline on the sieves, so things will go smoother.
Our filter pumps are provided with two hoses. One hose to let the water of the frame pool run towards the pump and one to allow the filtered water to flow back into the frame pool. These hoses are identical. Thus it doesn’t matter which hose you use where. The same thing applies to the extra hose of the heat pump. So useful!
Would you like to know how to attach the hoses of the frame pool pump(s)? In our blog we explain to you step by step how connecting your filter pump (and heat pump) to your frame pool should be done.
You’re almost there! The last step is filling the frame pool with water. We give you the final tips:
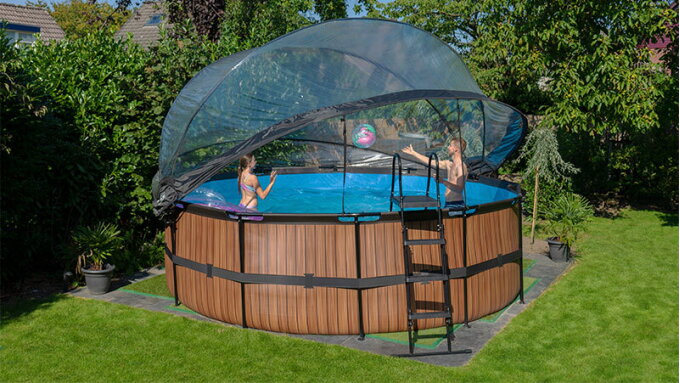
✔ This tip is only relevant if you have a frame pool with a canopy or a dome. Place the leg supports underneath the legs of the frame pool before you can fill the frame pool. Namely after filling the pool it’s quite difficult to lift one of the pool legs. We want to save you this effort. In the manual of your canopy or dome we explain to you how to attach the canopy or dome step by step.
✔ Place the end of the garden hose in the frame pool and turn on the water.
✔ Is your frame pool filled for about 2.5 cm? Then stop for a moment. It is now time to smooth out the creases from the bottom of the frame pool. Stepping into the pool and pushing the corners out with your foot helps too.
✔ Continue filling the frame pool until it’s filled to about 90%. Regularly check whether the legs and the hoses of the pump(s) are still tightly secured and how full your frame pool is, because you don’t want your pool to overflow.
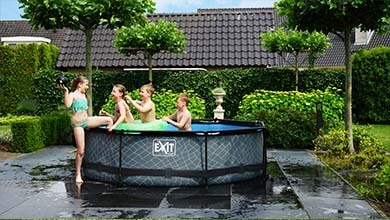
Finally, your frame pool has been set up! So, what are you waiting for? Grab your swimming clothes and enjoy a plunge into the water. Enjoy! Be sure to also read our blog about keeping the water of your frame pool clean. That way you can always take a fresh dive!
Do you have questions about our frame pools? Let us know, our customer service is here for you. Feel free to contact us through the chat, call +31 314 - 796 020 or send an email to info@exittoys.com. We are happy to help.

With an EXIT Toys heat pump you can enjoy your frame pool even during colder days. Curious about how a heat pump works? You can read all about it in this blog.
Are you already familiar with the new way of filtering the water of your frame pool? Discover the benefits of EXIT Toys filter wadding!
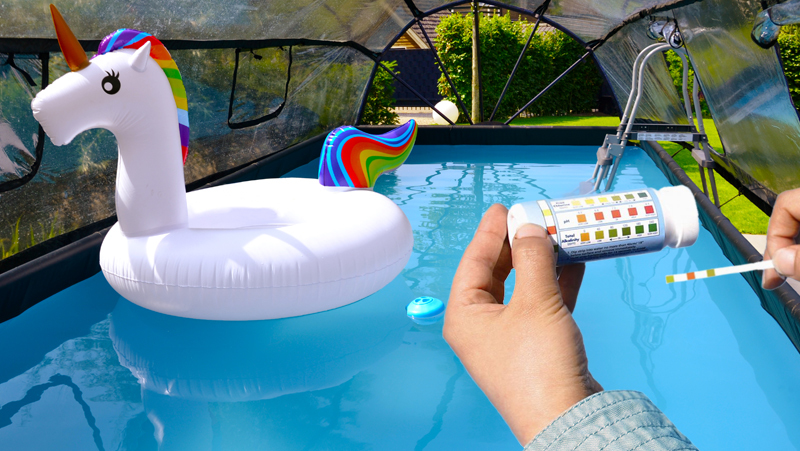
It is important to check the quality of the pool water regularly. Read more on how to go about that and what you need to be aware of in this EXIT Toys blog.
Our website uses cookies. We use functional, analytical, and tracking cookies to analyze traffic on our website and personalize content. This allows us to improve the user experience on the website.
By clicking 'Customize', you can learn more about the specific types of cookies and customize your preferences. By clicking 'Allow all cookies', you agree to the use of all cookies. You can find more information in our cookie policy.
Stay informed about interesting offers and news!